 feed
feed
I have been on the "fence" with my MacBook Pro (MBP) for a long time. My reason? The hard drive just is not big enough. Even if I went with a 250 gig hard drive I was like, okay that doesn't really solve my storage problem. With all of my music, videos and data 250 gigs of hard drive space is nothing. Double that and we have something. About two weeks ago I decided that I had enough. I immediately visited Other World Computing (OWC) and started looking for my new hard drive. From my experience with dealing with Apple Computers out of warranty OWC is the best place to get anything you would want for your Mac (ram, hard drives, replacement CD-ROM or DVD drives, etc.). It looked like there were two different brands available in 500gb sizes, Samsung, and Hitachi. I opted for the samsung drive, with the "do it yourself" enclosure. The reason why you need an enclosure is to image your old drive over firewire.
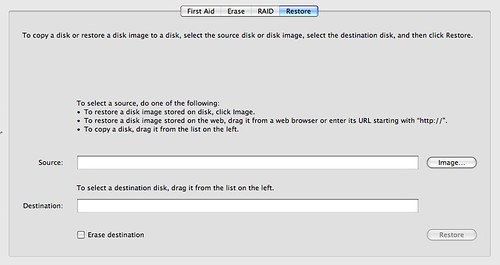
The first step is to get your new hard drive into the firewire/usb enclosure. Then run Disk Utility to image your existing drive to your new drive. Run Finder -> Applications -> Utility -> Disk Utility, then click your internal drive (located on the left panel), then click the Restore tab. If you are running Leopard, you should see the same pane I have pictured below. You want to drag your existing drive from the left to the "Source" text box, and then your new drive to the "Destination" text box.
Next let's take apart the MacBook Pro. This requires a couple of tools that I did not have. One being a T6 "torx" screw driver, and a #0000 philips screw driver. Luckily there was a Sears near me, so I just visited the awesome tools section. I have a bunch of extra screw drivers below, but you just need the two I mentioned.

Now we have to take the battery out, and remove the three philips head screws on the RAM cover.
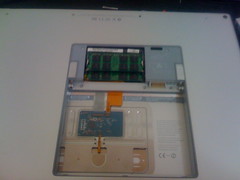
Underneath that are two "torx" screws, you'll need to remove along with three more philips head screens at the front of the battery bay. In order to crack the rest of the MBP open you'll have to also remove all of the philips head screws all around the outside of the case. Once you have all of the screws removed the hardest part of cracking the case open is removing the top panel. This is because there's these plastic clips at the front of the panel. I used a regular screw drive to pop the clips out. There is also a ribbon on the under side of the top panel that connects the keyboard/trackpad to the motherboard. It should just pop right off it's held to the motherboard with some non-conductive teflon tape.
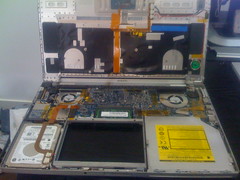
The hard drive is located on the lower left hand side of the case. It has a ribbon taped across the front of it. The hard drive is secured to the chasis by a plate held down by two "torx" screws. Carefully remove the two "torx" screws that hold the plate in place. Then carefully lift the ribbon from the top of the hard drive, it is held in place by double sided tape. After this all that is left is to remove the rubber grommets that are on the hard drive. These grommets are held in place by four "torx" screws, remove then and put then on your new drive.

Reverse these steps and you'll have your new 500gb hard drive ready for use.

If these instructions are too vague, please visit ExtremeTech's HowTo here.